Norton Security uninstall guide
How to uninstall Norton Security
This short guide will help you remove Norton Security from your operating system. This guide works best with Windows 10, but the steps could be adjusted to another version of Windows.

1. To uninstall Norton Security, make sure the application is no longer running on your system. To quit running the program, you should check the system tray and find the Norton logo on it.
Click on it with the right mouse button and find the option that says ‘quit’. Press on it and then also click ‘confirm’ when a new dialogue appears. Now Norton Security is turned off and it is safe to continue the uninstallation process.
Alternatively, you can stop the program from running by going to the Task Manager – you should press CTRL + ALT + DEL and wait for a new window to appear. Once you do this, just open the program list on the task manager and find the Norton Security application.
Just press ‘end task’ and then confirm your selection. In this way, the program will be prevented from running. The second method is best for computers that have older Windows versions than Windows 10 OS.
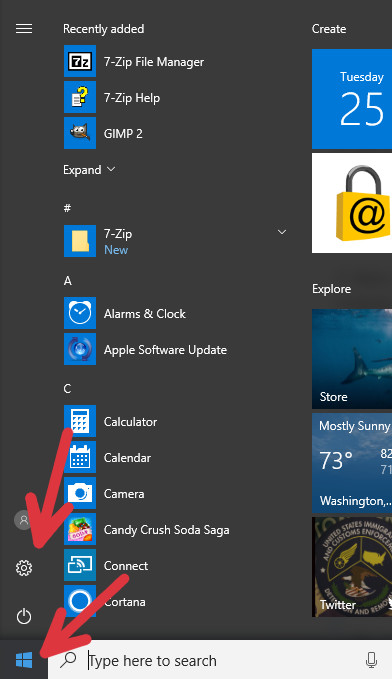
2. The next step is to find the gear-shaped logo on your ‘Start’ menu. To access this menu, just press the Windows logo on the left side of your screen and look left. Press on the gear icon.
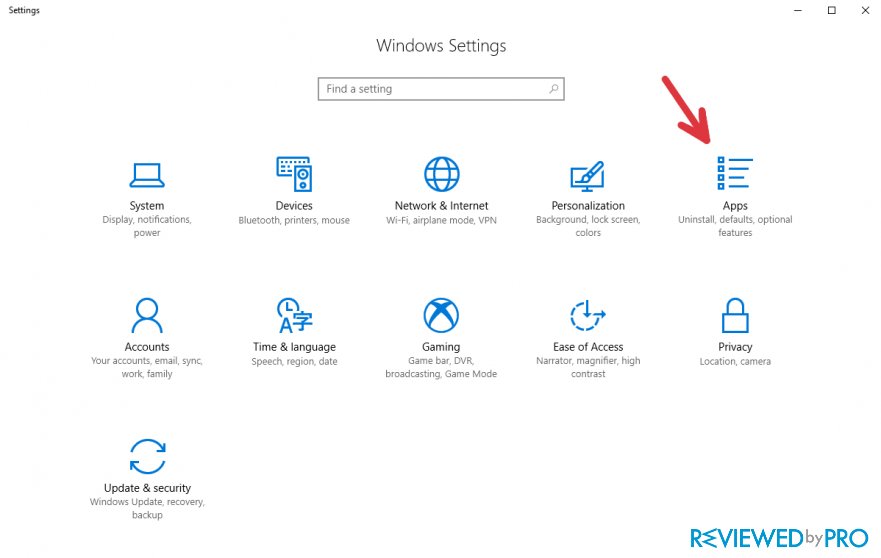
3. Find a feature that says ‘Apps’. Once you find this one, just press on it and wait for the program list to load. You will see all your programs on that list, so just check for Norton and you will be able to remove it with a few clicks.
Alternatively, you can find the program list by accessing the control panel. To do that, you will have to press on the ‘Computer’ icon on your desktop and find the ‘Control panel’ title at the top of the page. This option is best for users, who have Windows 8 or an older version of the system.
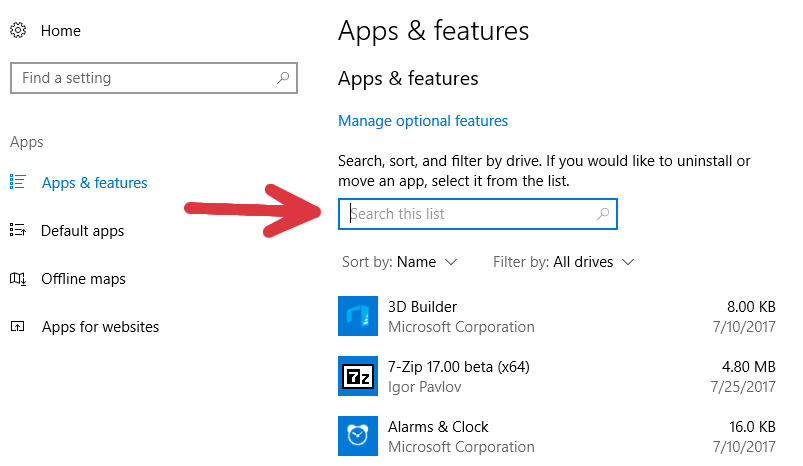
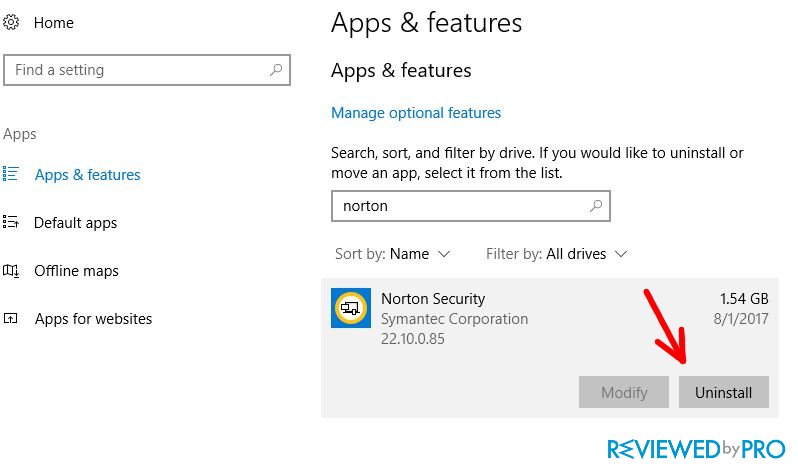
4. Now you should see the complete list of all the applications on your PC. Locate the search bar.
5. Type 'Norton' into the bar. This will help you find the app very quickly.
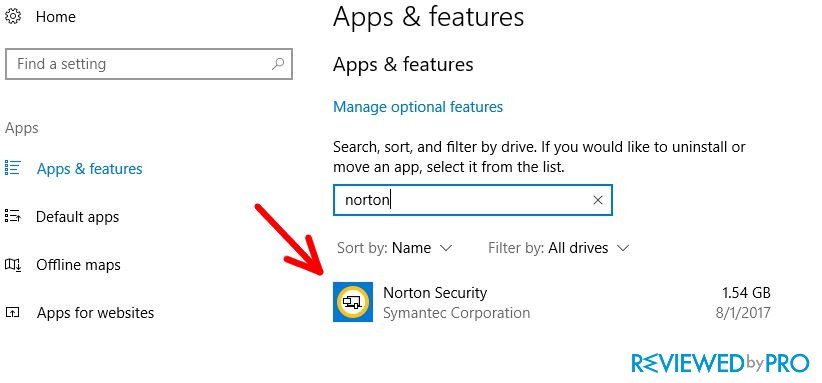
6. When you see the icon of the program, click on it. You will see two options – 'Modify' and 'Uninstall'. Click on 'Uninstall'.
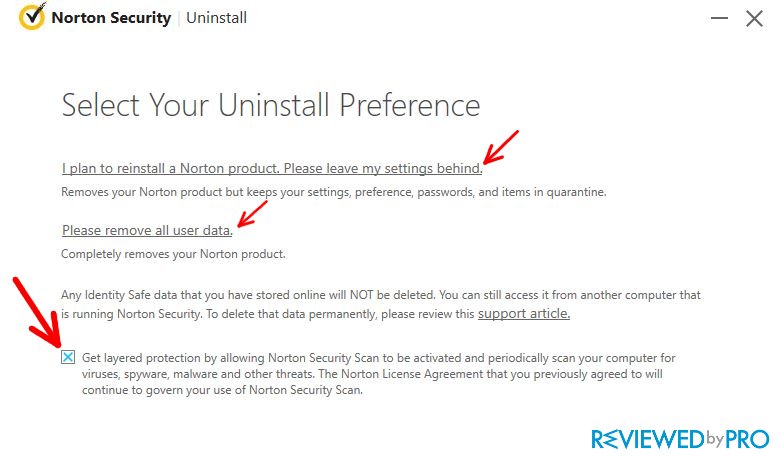
7. Now you can see a window with a few options. First of all, look at the checkbox. If you do not want Norton Security to activate its scan processes after the uninstallation, unmark the checkbox. Then, choose whether you want to leave the Norton settings on your PC system. If you want to uninstall Norton Security completely, choose 'Please remove all user data'.
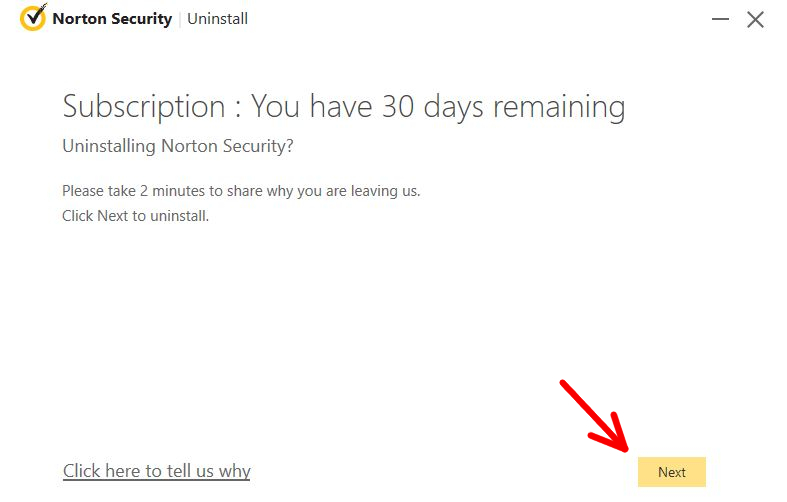
8. Here, simply click 'Next'.
9. The process is almost over. Now you should click on 'Restart now' in order to completely delete 'Norton'.
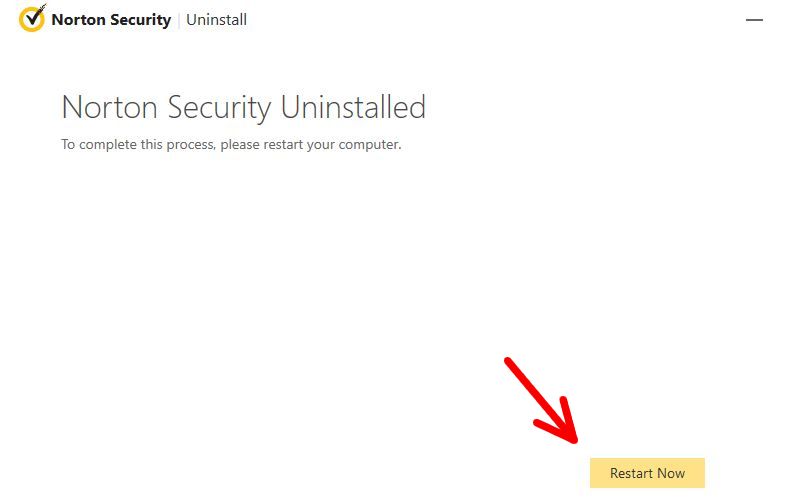
The uninstallation of Norton Security is over.
We hope you found this short step-by-step removal guide useful!


